simc Bitmutex Technologies
winget install --id=Bitmutex.Simc -e Electronic Circuit Simulation and Visualization Software, Open-Source and Royaty-Free Usage with web and multiplatform desktop versions
SimC Description
SimC is an electronic circuit simulation and visualization software designed to facilitate the design, simulation, and analysis of electronic circuits. It provides a web-based interface as well as native desktop applications for Windows, Linux, and macOS, ensuring cross-platform accessibility.
Key features include:
- Cross-platform Support: Available on web, Windows, Linux, and macOS.
- Real-time Visualization: Enables observation of circuit behavior during design.
- Open-source and Royalty-free: Accessible to all without licensing costs.
Ideal for students, teachers, and researchers, SimC simplifies the understanding of complex circuit behaviors through interactive and intuitive tools. It supports advanced features such as live simulations and component libraries, aiding in both learning and research. The software can be installed via winget for Windows users, enhancing its accessibility.
README
SimC : Circuit Simulation Software

![]()
SimC™ abbraviated as Simulation of Circuit is an advanced circuit simulation software written in Java8 and ported to run directly in a web browser using Google Web Toolkit (GWT). It is targeted for students,teachers and researchers. Comes in Web App and Native Desktop App (for Windows, Linux and MacOs)

For a hosted version of the application see:
- Bitmutex: https://www.simc.bitmutex.com/
- GH Pages: https://www.aamitn.github.io/simc/
Release Matrix
| Windows(winget,exe,msi) | Linux(Rpm,Deb) | MacOS (dmg,pkg) |
|---|---|---|
winget install simc | SimC-x.x.x-1.x86_64.rpm | SimC-x.x.x-arm64.dmg |
| SimC-x.x.x-Setup.exe | simc_x.x.x_amd64.deb | SimC-x.x.x-arm64.pkg |
| SimC-x.x.x-Setup.msi | ||
| Simc.appx | ||
| Simc.msi |
Build Script
| Option/Switch | Description | Example Usage |
|---|---|---|
| --npm, -n | Package Manager: Use npm. This is the default if no package manager option is provided. | build.bat --npm |
| --pnpm, -p | Package Manager: Use pnpm for Node.js. | build.bat --pnpm |
| --start-server, -s | Start HTTP Server: After the build process completes. Make sure python is installed | build.bat --start-server |
Building the web application
The web application can be compiled and run locally using Eclipse, or in a cloud development container like Github Codespaces or gitpod.io. Both of these services provide a number of free usage hours every month. You can also use the cloud tools from ./dev.sh on your local Linux machine or in a local docker container.
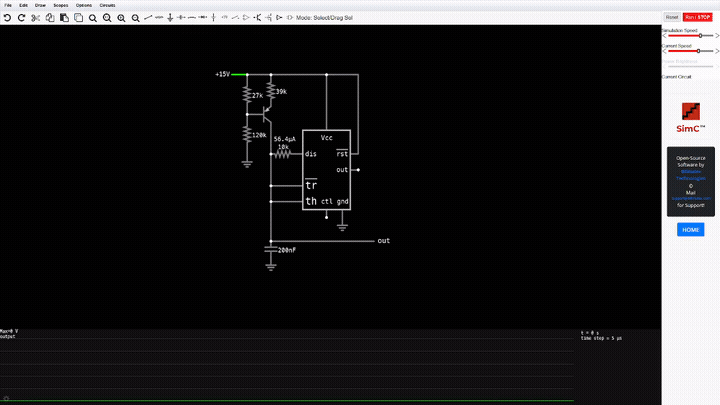
Illustration
Local Build
STEP 1: Develop/Build the Landing Page (Astro) [Location: site-source]
To build the astro application :
# 1. Run Gradle build with verbose output:
cd site-source
# 2. Create the web-site directory from the build files:
pnpm install
OR
npm install
# 3. Run Dev Server:
pnpm dev
OR
npm run dev
Build for production
pnpm build
OR
npm run build
This will create the index.html file , _astro directory and circuit-bg.svg file and some other files inside the site directory!
STEP 2: Build Locally using Gradle
To build the application using gradle, do the following:
# 1. Run Gradle build with verbose output:
gradle compileGwt --console verbose --info --scan
# 2. Create the web-site directory from the build files:
gradle makeSite --console verbose --info --scan
Now, just open site/circuitjs.html with your browser and enjoy!
>NOTE: If build fails for scan related issues remove the develocity{} method from build.gradle and remove --scan switch and try again.
You can do the same thing inside GitHub Codespaces. Then after creating the site directory, you can create a web server using:
cd site
python3 -m http.server 8080
>>Don't Juggle the sequence of STEP1->STEP2 as it will end up in un predictable builds as astro build cleans the build output directory on each new build.
Head over http://localhost:8080/circuitjs.html OR goto http://localhost:8080
Development using Eclipse
The tools you will need to build the project are:
- Eclipse, Oxygen version.
- GWT plugin for Eclipse.
Install "Eclipse for Java developers" from here. To add the GWT plugin for Eclipse follow the instructions here.
This repository is a project folder for your Eclipse project space. Once you have a local copy you can then build and run in development mode or build for deployment. Running in super development mode is done by clicking on the "run" icon on the toolbar and choosing http://127.0.0.1:8888/circuitjs.html from the "Development Mode" tab which appears. Building for deployment is done by selecting the project root node and using the GWT button on the Eclipse taskbar and choosing "GWT Compile Project...".
GWT will build its output in to the "war" directory. In the "war" directory the file "iframe.html" is loaded as an iFrame in to the spare space at the bottom of the right hand pannel. It can be used for branding etc.
Development using cloud containers
- Install Visual Studio Code and the appropriate remote extension: either Gitpod Extension or Codespaces Extension.
- Open your fork of the
simcrepository in your chosen provider's dev container. - This should open a new tab in your browser showing VS Code. Click in the green button in the bottom left corner, then select "Open in VS Code Desktop" in the popup menu that opened. Click "Allow" in all URL popups and authenticate using github if asked.
Once you have successfully connected your local VS Code to the remote workspace, you should be able to see the content of the remote container in your local VS Code. You can now continue with the setup:
- Open a shell inside the dev container by pressing
Ctrl+Backtickor pressingF1and typing "Create new Terminal". - Make sure you are in the folder
/workspaces/circuitjs1inside the container (necessary only once per newly created container). - Run
./dev.sh setupto install all development dependencies, including GWT and Java. - Run
./dev.sh startto start the web server and the GWT code server. This will start two services: http://localhost:8000 and http://localhost:9876. - Make sure both port and 8000 and 9876 are forwarded in the "Ports" tab (next to "Terminal").
- If you edit a Java file in VS Code and reload http://localhost:8000, it should recompile the file automatically. It will then load the compiled JavaScript and the corresponding source map from the code server running on http://localhost:9876. You should be able to see the your changes in the web application.
> Note: When running the web application server inside a remote dev container, port forwarding is necessary in order to access the remote server from your own computer. This port forwarding is provided by Visual Studio Code running on your local computer.
>
> Theoretically, it would be possible to use the browser-based VS Code interface. However, both Gitpod and Codespaces map forwarded ports to different domain names instead of different ports, which confuses the GWT code loader. It is possible to fix this by live-patching the serverUrl variable in circuitjs1.nocache.js using a custom HTTP server, but it also requires setting the port visibility to "Public" to avoid CORS errors due to redirects. Using a local installation of VS Code is much simpler.
Deployment of the web application
- "GWT Compile Project..." as explained above or run
./dev.sh compile. This will put the outputs in to the "war" directory in the Eclipse project folder. You then need to copy everything in the "war" directory, except the "WEB-INF" directory, on to your web server. - Customize the header of the file "circuitjs1.html" to include your tracking, favicon etc.
- Customize the "iframe.html" file to include any branding you want in the right hand panel of the application
- The optional file "shortrelay.php" is a server-side script to act as a relay to a URL shortening service to avoid cross-origin problems with a purely client solution. You may want to customize this for your site. If you don't want to use this feature edit the circuitjs1.java file before compiling.
- If you wish to enable dropbox loading and saving a dropbox API app-key is needed. This should be edited in to the circuitjs.html file where needed. If this is not included the relevant features will be disabled.
The link for the full-page version of the application is now:
http:////circuitjs1.html
(you can rename the "circuitjs1.html" file if you want too though you should also update "shortrelay.php" if you do).
Just for reference the files should look like this
simc/site/                      # Root directory containing the application front-end
├── circuitjs.html              # Full-page version of the application
├── iframe.html                 # Minimal iframe-compatible version (see documentation)
├── shortrelay.php              # Optional server-side helper script (see documentation)
└── circuitjs1/                 # Main application files (compiled by GWT)
    ├── circuits/              # Directory containing example circuit files
    ├── setuplist.txt          # Index file referencing example circuits
    └── [other GWT files]      # Various JavaScript/HTML/CSS files built by GWT
Docker/podman containers
Building and Running Circuitjs in docker containers
(replace the podman command with docker if you prefere docker)
- To build Docker image using podman:
podman build -f circuitjs1.Containerfile -t circuitjs1:latest
- To then run Docker image using podman:
podman run --name=circuitjs1 --rm -d -p 8000:8000 circuitjs1:latest
CircuitJS1 should be accessable at: http://localhost:8000/circuitjs.html
Development using docker containers
(replace the podman command with docker if you prefere docker)
- To build the development Docker image using podman:
podman build -f dev-start.Containerfile -t circuitjs1-dev:latest
- To then run the development Docker image using podman:
podman run --rm -it -p 127.0.0.1:8000:8000/tcp -p 127.0.0.1:9876:9876/tcp circuitjs1-dev:latest
CircuitJS1 should be accessable at: http://localhost:8000/circuitjs.html
If you need to modify the files while the container is running (using the gwt auto-build method):
podman run --rm -it -v $(pwd):/src:Z -p 127.0.0.1:8000:8000/tcp -p 127.0.0.1:9876:9876/tcp circuitjs1-dev:latest
This will use the current directory inside the container.
Embedding
You can link to the full page version of the application using the link shown above.
If you want to embed the application in another page then use an iframe with the src being the full-page version.
You can add query parameters to link to change the applications startup behaviour. The following are supported:
Example Query : .../circuitjs.html?= , .../circuitjs.html?running=true
| Query Parameter | Description |
|---|---|
?cct= | Load the circuit from the URL (like the # in the Java version) |
?ctz= | Load the circuit from compressed data in the URL |
?startCircuit= | Loads the circuit named filename from the Circuits directory |
?startCircuitLink= | Loads the circuit from a specified URL (must support CORS, e.g., Dropbox shared link) |
?euroResistors=true | Force "Euro" style resistors (default based on browser language) |
?IECGates=true | Force IEC logic gates (default based on browser language) |
?usResistors=true | Force "US" style resistors (default based on browser language) |
?whiteBackground= | Toggle white background |
?conventionalCurrent= | Toggle conventional current flow display |
?running= | Start with simulation running (true by default) |
?hideSidebar= | Hide the sidebar (false by default) |
?hideMenu= | Hide the menu (false by default) |
?editable= | Allow circuit editing (true by default) |
?positiveColor=%2300ff00 | Set positive voltage color (hex format: rrggbb, %23 is #) |
?negativeColor=%23ff0000 | Set negative voltage color |
?selectColor=%2300ffff | Set selection color |
?currentColor=%23ffff00 | Set current flow color |
?mouseWheelEdit= | Enable value changes via mouse wheel |
?mouseMode= | Set initial mouse mode or trigger UI actions (e.g., about, importfromlocalfile) |
?hideInfoBox= | Hide the info box |
The simulator can also interface with your javascript code. See war/jsinterface.html for an example.
Building an Electron application
The Electron project allows web applications to be distributed as local executables for a variety of platforms. This repository contains the additional files needed to build circuitJS1 as an Electron application.
The general approach to building an Electron application for a particular platform is documented here. The following instructions apply this approach to circuit JS.
To build the Electron application loacted at app directory:
- Compile the astro frontend in site-source and the main application using Gradle, as above.
-
AUTO MOD:
- Install Dependencies
cd app npm install OR pnpm install - Start the application Locally
npm start OR pnpm start - Package the binaries for Win/Linux/Mac
npm make OR pnpm make - Publish the packaged binaries [This is meant for CI, for manual publish, make sure
GITHUB_TOKENis set inapp/forge.config.json]npm publish OR pnpm publish
- Install Dependencies
-
MANUAL MODE:
- Download and unpack a pre-built Electron binary for your target platform.
- Copy the
appdirectory from this repository to the location specified here in the Electron binary directory structure. >Copyapptoelectron/resources(in Win/Linux) OR toelectron/Electron.app/Contents/Resources/in MacOS - Copy the
sitedirectory, containing the compiled SimC application, in to theappdirectory of the Electron binary directory structure as mentioned above. - Run the "Electron" executable file. It should automatically load SimC.
> Signing of the electron forge appx(ms store) binary is done using our provided codesigning certifiacte cert.pfx , you may change the same with your own in forge.config.json
To decrypt in command line without ps script:
>CMD/Linux : openssl aes-256-cbc -d -pbkdf2 -in cert.pfx.enc -out cert.pfx -pass pass:
>PS : & 'openssl' 'aes-256-cbc' '-d' '-pbkdf2' '-in' 'cert.pfx.enc' '-out' 'cert.pfx' '-pass' 'pass:K4fecn6abc$$$'