fastfetch is a system information tool designed to display hardware, software, and performance metrics in a visually appealing manner. Unlike neofetch, fastfetch is written primarily in C, ensuring faster execution and reduced resource usage.
Key Features:
Speed: Optimized for quick execution, making it ideal for use in shell scripts or startup processes.
Cross-platform Support: Works on Linux, macOS, Windows, Android, FreeBSD, OpenBSD, NetBSD, DragonFly, Haiku, and SunOS.
Customizable Output: Uses JSONC (JSON with comments) for configuration, allowing users to tailor the displayed information and formatting.
Performance Metrics: Provides detailed insights into CPU, GPU, memory, disk usage, network interfaces, and more.
Comprehensive Modules: Supports a wide range of modules for different types of system information, including distro detection, package counts, shell details, and more.
Accurate Data Display: Ensures precise representation of system data, such as memory sizes in appropriate units (e.g., 555.00 MiB instead of generic approximations).
Audience & Benefit:
Ideal for system administrators, developers, and users who need a fast, lightweight tool to gather and display system information. Fastfetch provides a polished and customizable way to present hardware and software details without the overhead of more resource-intensive alternatives.
Installation can be done via winget on Windows or through various package managers on Linux distributions.
README
Fastfetch
Fastfetch is a neofetch-like tool for fetching system information and displaying it in a visually appealing way. It is written mainly in C, with a focus on performance and customizability. Currently, it supports Linux, macOS, Windows 8.1+, Android, FreeBSD, OpenBSD, NetBSD, DragonFly, Haiku and SunOS (illumos, Solaris).
> Note: Fastfetch is only actively tested on x86-64 and aarch64 platforms. It may work on other platforms but is not guaranteed to do so.
View all data that fastfetch detects: fastfetch -s [:][:] --format json
Display help messages: fastfetch --help
Generate a minimal config file: fastfetch [-s [:]] --gen-config []
Use: --gen-config-full to generate a full config file with all optional options
Customization
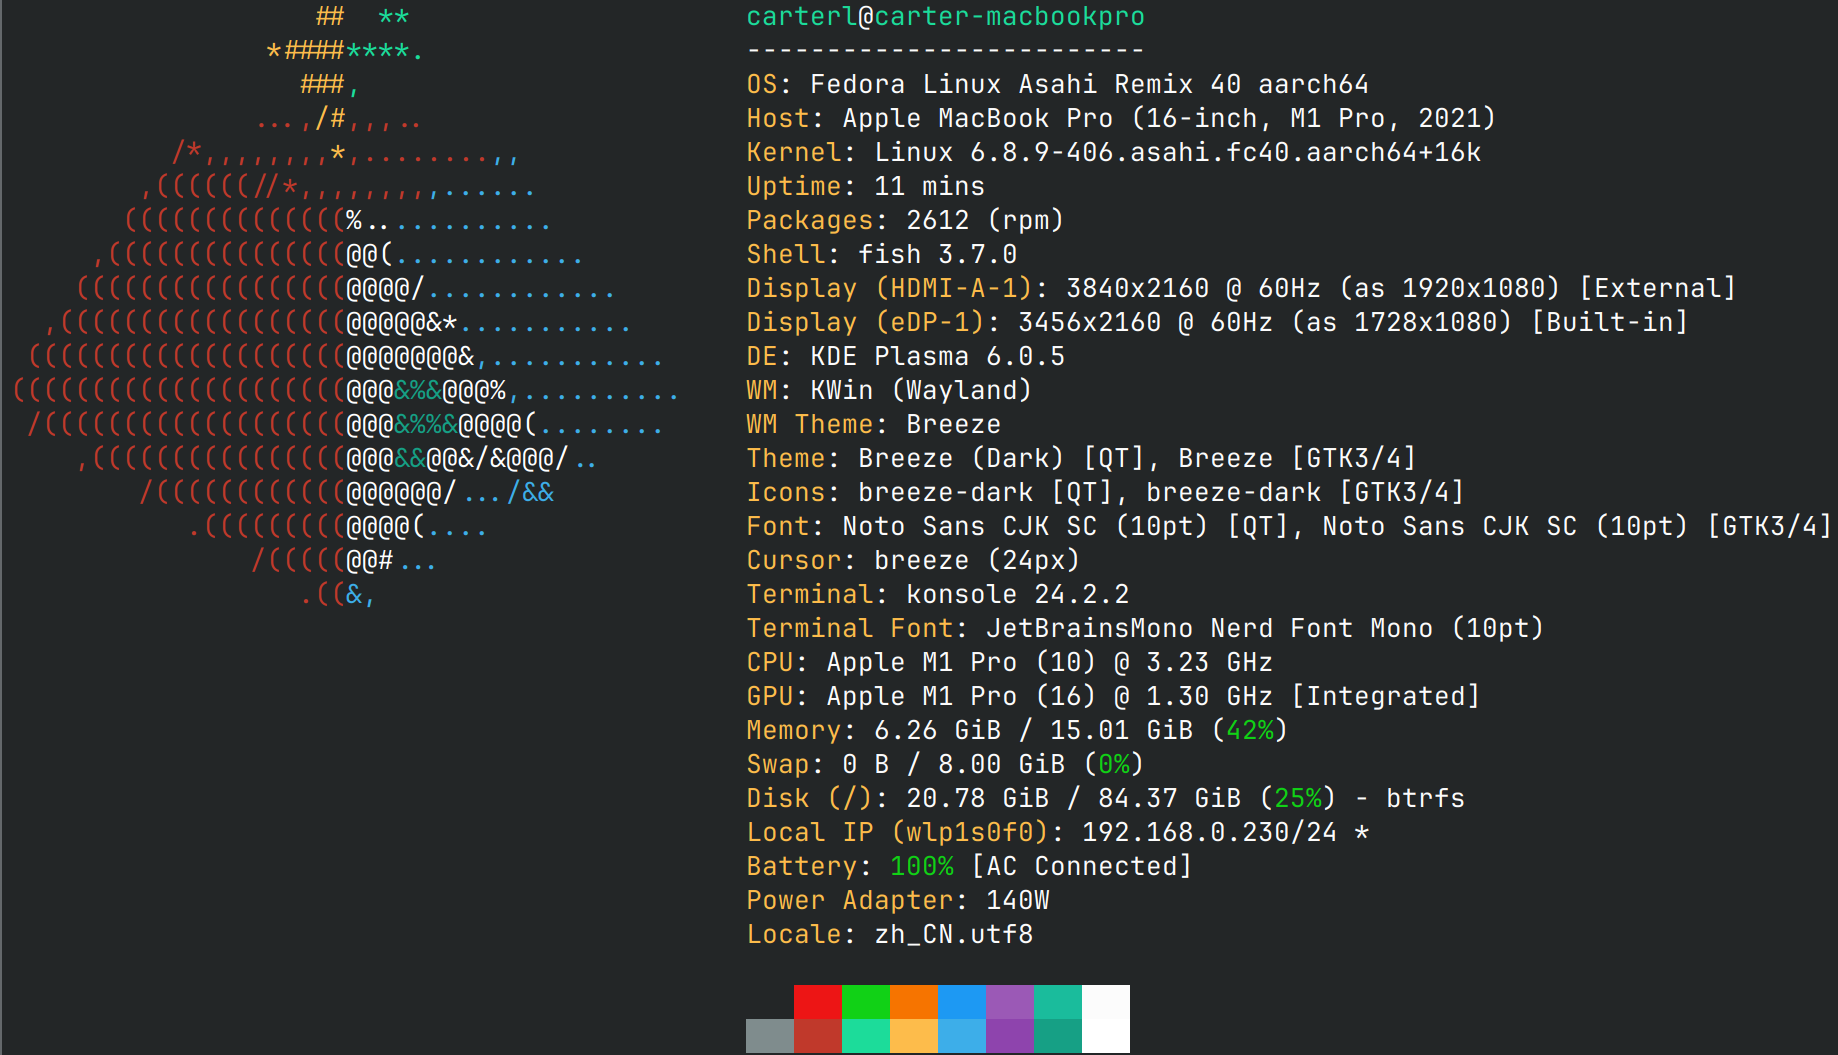
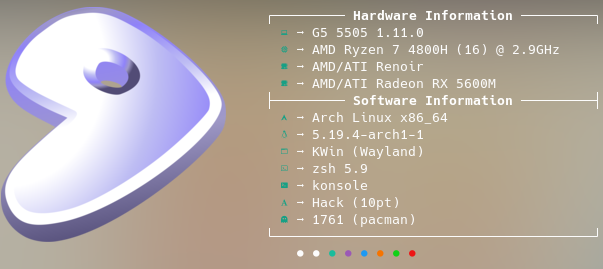
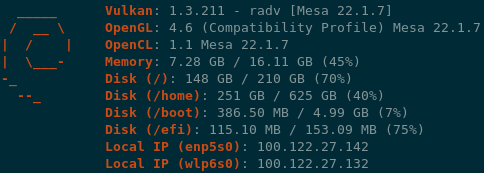
Fastfetch uses JSONC (JSON with comments) for configuration. See the Wiki for details. There are some premade config files in the presets directory, including those used for the screenshots above. You can load them using -c . These files can serve as examples of the configuration syntax.
Logos can also be heavily customized; see the logo documentation for more information.
WARNING
Fastfetch supports a Command module that can run arbitrary shell commands. If you copy-paste a config file from an untrusted source, it may contain malicious commands that can harm your system or compromise your privacy. Please always review the config file before using it.
FAQ
Q: Neofetch is good enough. Why do I need fastfetch?
Fastfetch is actively maintained.
Fastfetch is faster, as the name suggests.
Fastfetch has a greater number of features, though by default it only has a few modules enabled; use fastfetch -c all to discover what you want.
Fastfetch is more configurable. You can find more information in the Wiki: .
Fastfetch is more polished. For example, neofetch prints 555 MiB in the Memory module and 23 G in the Disk module, whereas fastfetch prints 555.00 MiB and 22.97 GiB respectively.
Q: Fastfetch shows my local IP address. Does it leak my privacy?
A local IP address (10.x.x.x, 172.x.x.x, 192.168.x.x) has nothing to do with privacy. It only has meaning if you are on the same network, for example, if you connect to the same Wi-Fi network.
Actually, the Local IP module is the most useful module for me personally. I (@CarterLi) have several VMs installed to test fastfetch and often need to SSH into them. With fastfetch running on shell startup, I never need to type ip addr manually.
If you really don't like it, you can disable the Local IP module in config.jsonc.
Q: Where is the config file? I can't find it.
Fastfetch does not generate a config file automatically. You can use fastfetch --gen-config to generate one. The config file will be saved in ~/.config/fastfetch/config.jsonc by default. See the Wiki for details.
Q: The configuration is so complex. Where is the documentation?
Fastfetch uses JSON (with comments) for configuration. I suggest using an IDE with JSON schema support (like VSCode) to edit it.
Alternatively, you can refer to the presets in the presets directory.
Fastfetch uses format to generate output. For example, to make the GPU module show only the GPU name (leaving other information undisplayed), you can use:
{
    "modules": [
        {
            "type": "gpu",
            "format": "{name}" // See `fastfetch -h gpu-format` for details
        }
    ]
}
...which is equivalent to fastfetch -s gpu --gpu-format '{name}'
See fastfetch -h format for information on basic usage. For module-specific formatting, see fastfetch -h -format
Q: I have my own ASCII art / image file. How can I show it with fastfetch?
If you just want to display the distro name in FIGlet text:
# install pyfiglet and jq first
pyfiglet -s -f small_slant $(fastfetch -s os --format json | jq -r '.[0].result.name') && fastfetch -l none
Q: My image logo behaves strangely. How can I fix it?
See the troubleshooting section:
Q: Fastfetch runs in black and white on shell startup. Why?
This issue usually occurs when using fastfetch with p10k. There are known incompatibilities between fastfetch and p10k instant prompt.
The p10k documentation clearly states that you should NOT print anything to stdout after p10k-instant-prompt is initialized. You should put fastfetch before the initialization of p10k-instant-prompt (recommended).
You can always use fastfetch --pipe false to force fastfetch to run in colorful mode.
Q: Why do fastfetch and neofetch show different memory usage results?
Q: I use Debian / Ubuntu / Debian-derived distro. My GPU is detected as XXXX Device XXXX (VGA compatible). Is this a bug?
Try upgrading pci.ids: Download and overwrite the file /usr/share/hwdata/pci.ids. For AMD GPUs, you should also upgrade amdgpu.ids: Download and overwrite the file /usr/share/libdrm/amdgpu.ids
Alternatively, you may try using fastfetch --gpu-driver-specific, which will make fastfetch attempt to ask the driver for the GPU name if supported.
Q: I get the error Authorization required, but no authorization protocol specified when running fastfetch as root
Try export XAUTHORITY=$HOME/.Xauthority
Q: Fastfetch cannot detect my awesome 3rd-party macOS window manager!
{
  "logo": {
    "type": "sixel", // DO NOT USE "auto"
    "source": "C:/path/to/image.png", // Do NOT use `~` as fastfetch is a native Windows program and doesn't apply cygwin path conversion
    "width": , // Optional
    "height":  // Optional
  }
}
If you installed fastfetch via scoop or downloaded the binary directly from the GitHub Releases page:
{
  "logo": {
    "type": "raw", // DO NOT USE "auto"
    "source": "C:/path/to/image.sixel",
    "width": , // Required
    "height":  // Required
  }
}
Q: I want feature A / B / C. Will fastfetch support it?
Fastfetch is a system information tool. We only accept hardware or system-level software feature requests. For most personal uses, I recommend using the Command module to implement custom functionality, which can be used to grab output from a custom shell script:
// This module shows the default editor
{
    "modules": [
        {
            "type": "command",
            "text": "$EDITOR --version | head -1",
            "key": "Editor"
        }
    ]
}
Otherwise, please open a feature request in GitHub Issues.
This program will not transfer any information to other networked systems unless specifically requested by the user or the person installing or operating it