Valeronoi is a companion application for Valetudo, designed to generate and visualize WiFi signal strength maps using Voronoi diagrams. This tool helps users create detailed and accurate representations of wireless coverage areas by leveraging data from compatible robots running Valetudo.
Key Features:
Real-time visualization of WiFi signal strength through dynamic Voronoi diagrams.
Integration with persistent maps for enhanced accuracy and consistency.
Configuration options to customize the appearance and behavior of visualizations.
Cross-platform support, allowing installation via winget on Windows and availability on Linux and macOS.
Performance tuning features, such as OpenGL rendering and map simplification, to optimize display quality and responsiveness.
Audience & Benefit:
Ideal for robot owners using Valetudo, network engineers, and tech enthusiasts seeking to optimize WiFi coverage. Valeronoi provides actionable insights into wireless signal distribution, enabling informed decisions about router placement and coverage optimization.
README
Valeronoi
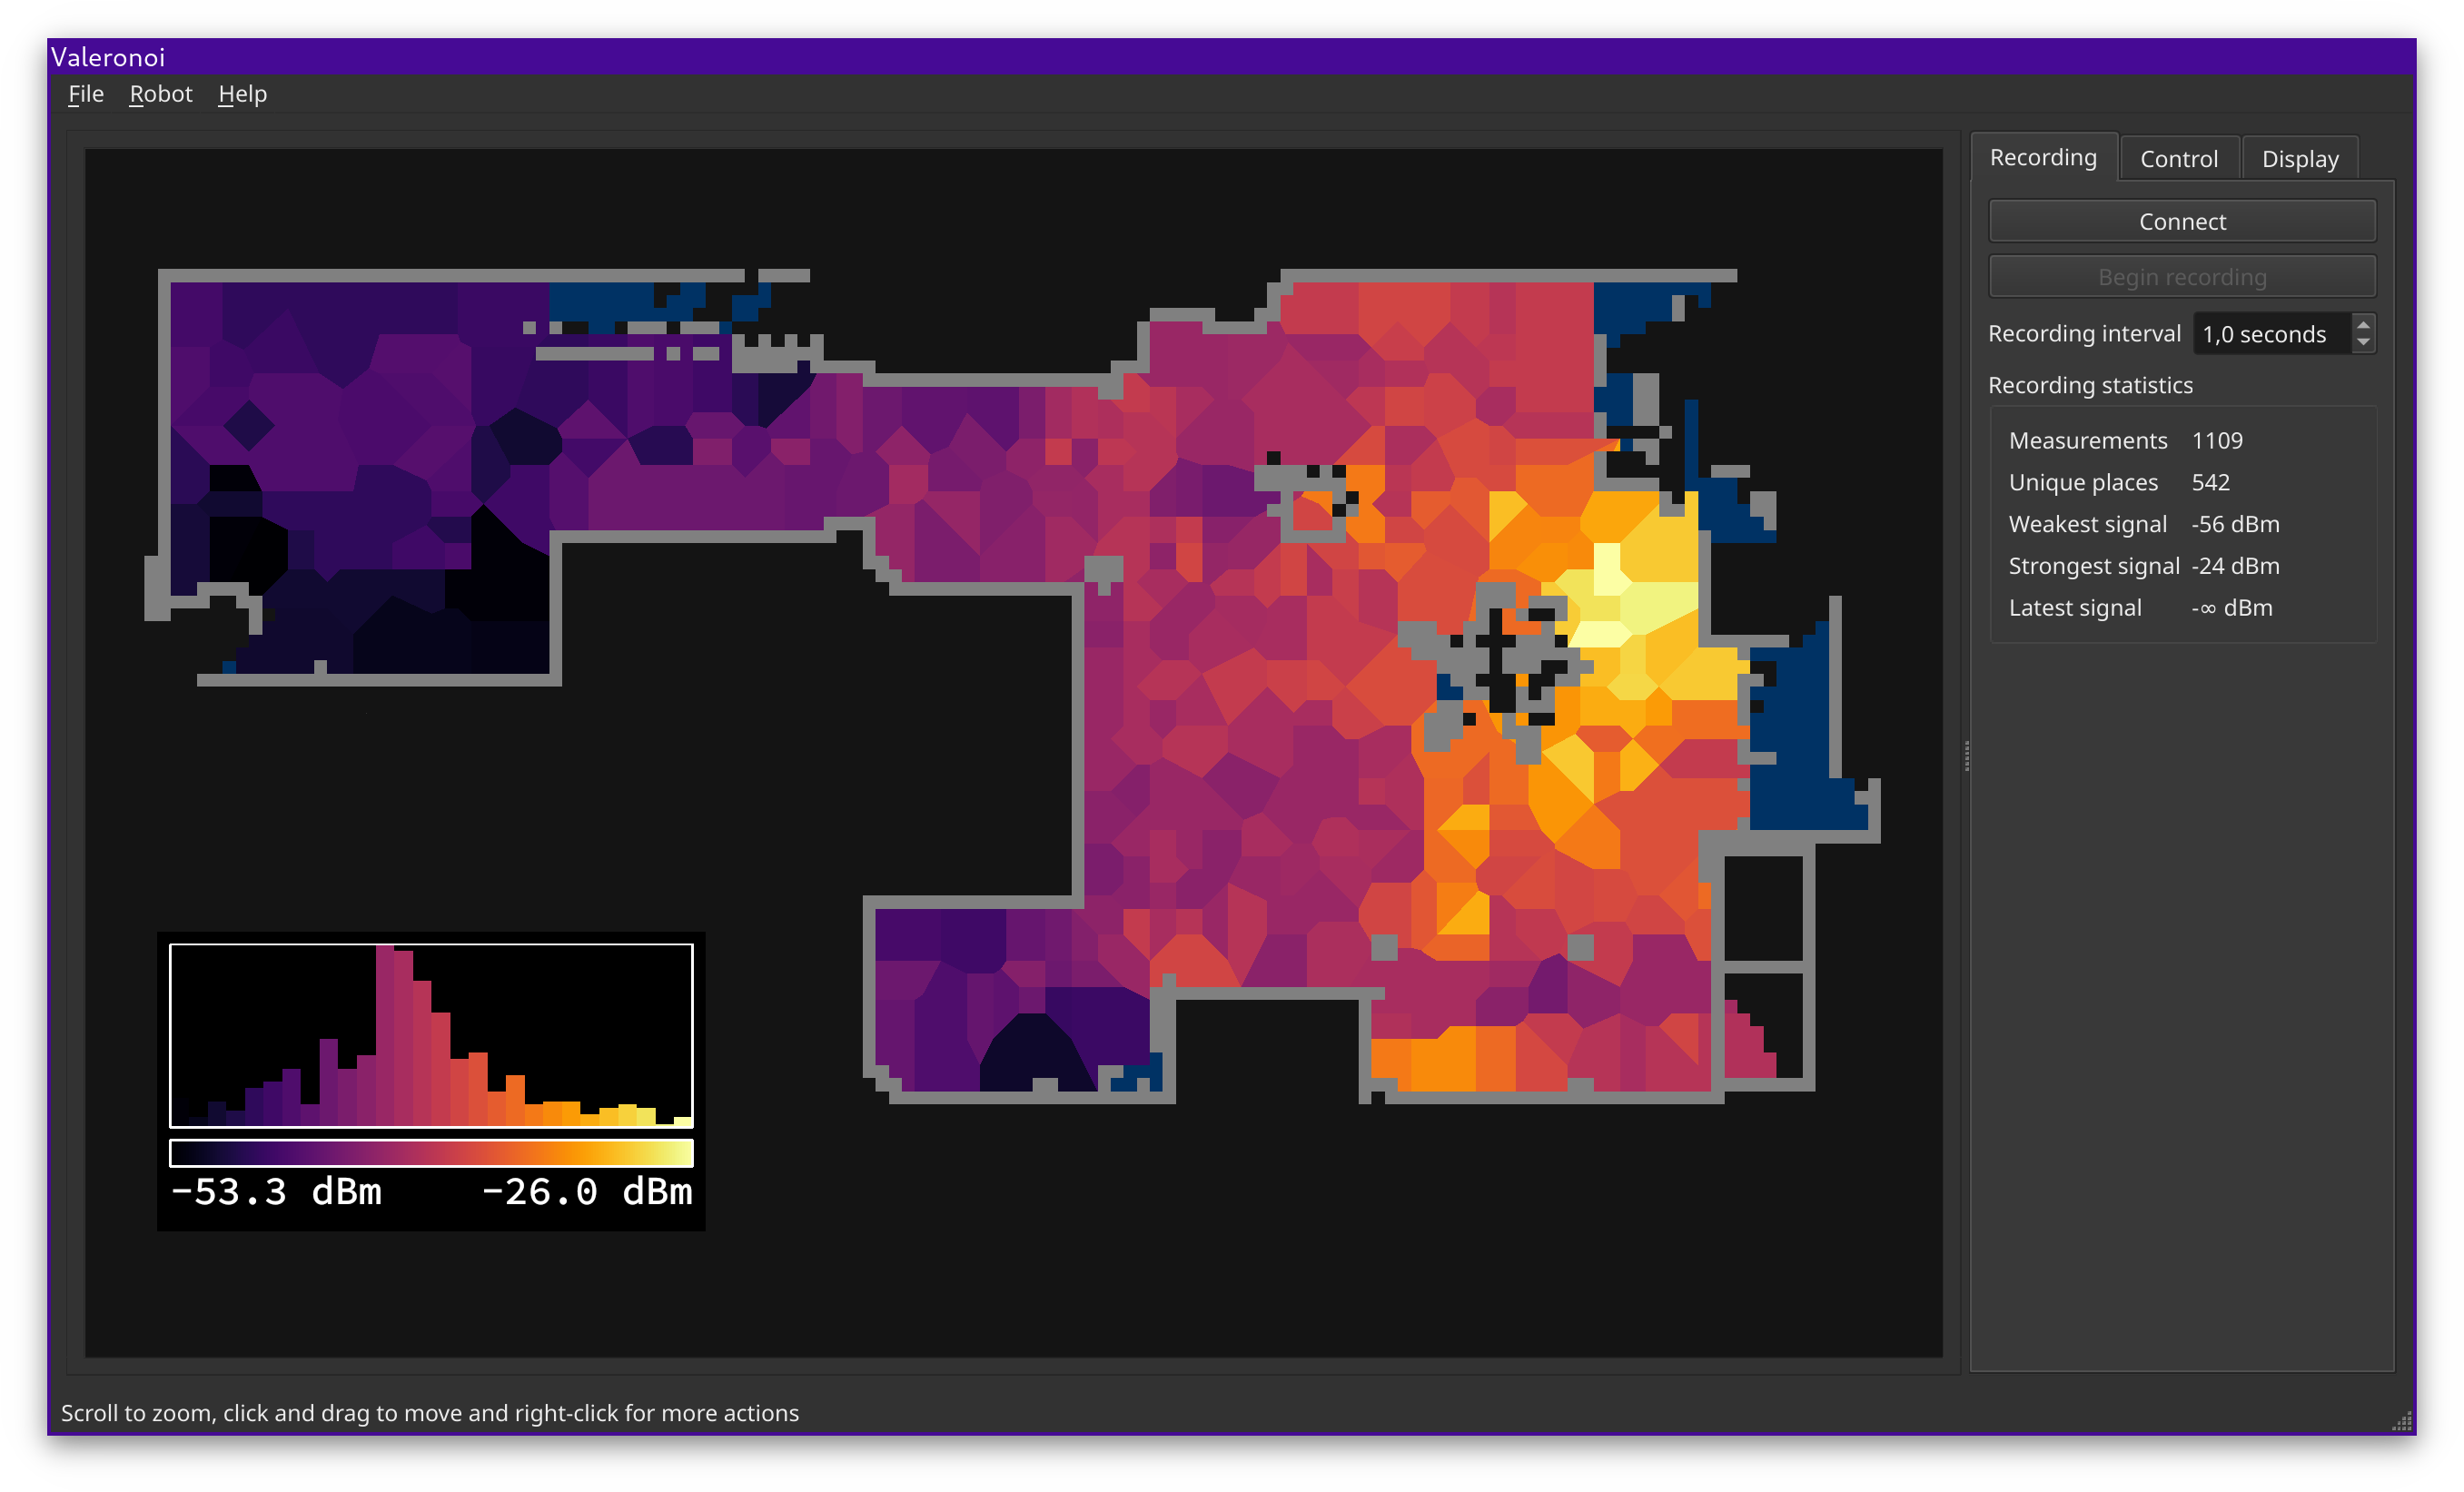
Valeronoi (Valetudo + Voronoi) is a companion for Valetudo for generating WiFi signal strength maps. It visualizes them using a Voronoi diagram.
Features
Real-time WiFi Mapping: Record WiFi signal strength while your robot cleans.
Valetudo Integration: Connects directly to robots running Valetudo (API v2).
Voronoi Visualization: Beautifully renders signal strength across your floor plan.
Export: Save your generated maps as images for sharing or documentation.
Persistent Storage: Save and load your measurements in the Valeronoi WiFi Map (.vwm) format.
Robot Control: Basic controls for starting/stopping cleanups directly from the app.
Cross-platform: Available for Linux, macOS, and Windows.
Headless CLI Mode (tested on Linux): Automated recording without GUI, ideal for scheduled scans via cron or containers.
Installation
Binary distributions are available for Linux, macOS and Windows (x86_64). They can be found in the releases.
Linux: Provided as AppImages. Built on Ubuntu 24.04 LTS with Qt 6.
macOS: Built for macOS 15 (Sequoia) on both Intel and Apple Silicon (Universal/Separate binaries).
Windows: Available as an installer and a portable zip. Requires MSVC redistributable DLLs (included in the installer).
Basic Usage
Prerequisites: Ensure your robot is running a recent Valetudo version (API v2). Persistent maps are highly recommended.
Setup: Configure the robot connection in Robot → Setup.
Connect: Click the Connect button to establish a connection with the robot.
Verify: Ensure the correct map is displayed.
Record: Click Begin recording to start collecting WiFi data.
Clean: Start a cleanup (either via Valeronoi's tab or Valetudo).
Monitor: Watch the map update in real-time as the robot moves.
Finish: Once the robot returns to the dock, stop the recording and save your work as a .vwm file.
Important: Map Stability
If your robot does not support persistent maps (e.g., older Roborock V1) or the feature is disabled, only record during partial cleanups. A full cleanup may regenerate the map, changing internal coordinates and corrupting the recording.
Display & Performance
If the visualization is slow, adjust settings in the Display tab:
Disable "Draw floor"
Uncheck "Restrict to ..." options
Increase the Simplify slider
Toggle OpenGL (Note: Performance may vary; can cause issues in some VMs or Remote Desktop sessions).
Building from source
Prerequisites
C++ Compiler: Support for C++17 (e.g., GCC 7+, Clang 5+, MSVC 2017+).
Qt 6: Core, Widgets, Network.
CGAL: Computational Geometry Algorithms Library (v5.x or v6.x recommended).