Bloxsmith








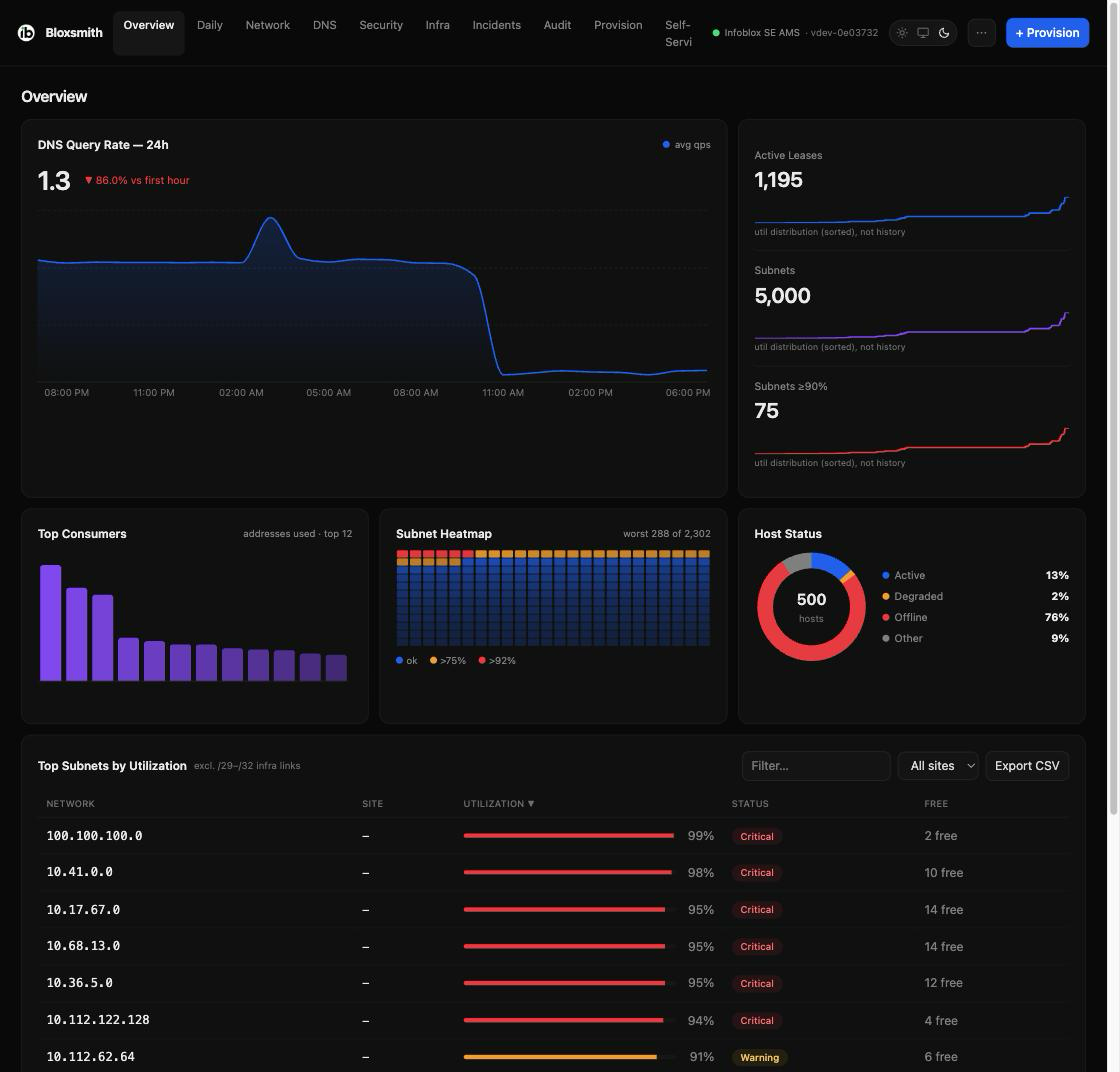
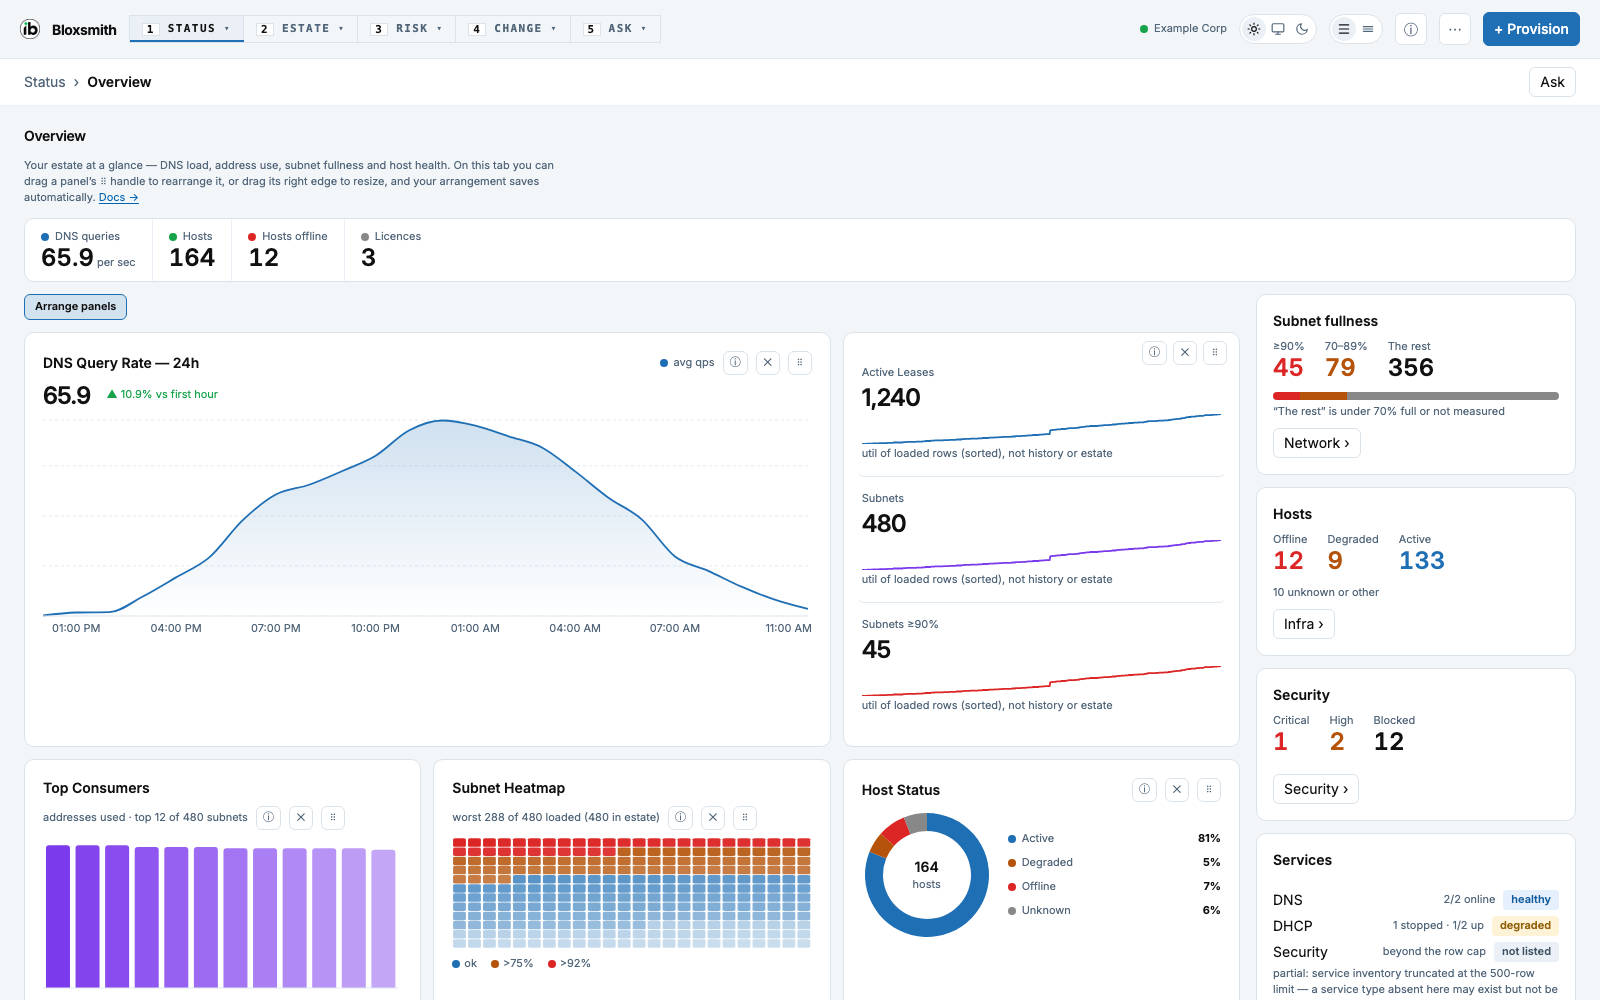
Bloxsmith is a dashboard for your Infoblox Portal (CSP) data that runs on your own computer.
Setup takes about five minutes with Docker Desktop. You end up with a page at
that keeps your API key encrypted and shows your subnets, DNS and
security data.
Light theme
| Area | What you see |
|---|
| Subnets and DHCP | Leases, how full each subnet is, which ones are running out |
| DNS | Records, zones, query rates |
| Security | Policies, threat indicators, audit logs |
| AI query box (optional) | Ask questions about your data in plain English |
What each tab does lists all 15 tabs and says which ones change things in Infoblox.
Quick start
-
Install Docker Desktop (free), open it once, and leave it running.
-
Open a terminal (Terminal on macOS and Linux, Command Prompt on Windows) and paste the block for your computer:
macOS
# make a Bloxsmith folder in your home folder and go into it
mkdir -p ~/Bloxsmith && cd ~/Bloxsmith
# download the file that tells Docker how to run Bloxsmith
curl -fsSLO https://raw.githubusercontent.com/holland-built/bloxsmith/master/docker-compose.yml
# download the updater you double-click later
curl -fsSLO https://raw.githubusercontent.com/holland-built/bloxsmith/master/update.command
# allow the updater to run
chmod +x update.command
Windows
REM make a Bloxsmith folder in your user folder
mkdir "%USERPROFILE%\Bloxsmith" 2>nul
REM go into it
cd /d "%USERPROFILE%\Bloxsmith"
REM download the file that tells Docker how to run Bloxsmith
curl.exe -fsSLO https://raw.githubusercontent.com/holland-built/bloxsmith/master/docker-compose.yml
REM download the updater you double-click later
curl.exe -fsSLO https://raw.githubusercontent.com/holland-built/bloxsmith/master/update.bat
Linux
# make a Bloxsmith folder in your home folder and go into it
mkdir -p ~/Bloxsmith && cd ~/Bloxsmith
# download the file that tells Docker how to run Bloxsmith
curl -fsSLO https://raw.githubusercontent.com/holland-built/bloxsmith/master/docker-compose.yml
# download the updater you run later
curl -fsSLO https://raw.githubusercontent.com/holland-built/bloxsmith/master/update.sh
# allow the updater to run
chmod +x update.sh
-
Start it from the same terminal. The first start downloads Bloxsmith and takes a minute or two:
# start Bloxsmith in the background; it also starts again after a reboot
docker compose up -d
-
Go to and pick a passphrase. It unlocks your saved keys.
-
Make an API key at (your name, top right > User API Keys > Create) and paste it into Bloxsmith.
You only add the key once. It is kept encrypted and survives restarts and updates.
What you need
| Where | Needs |
|---|
| Your computer | Docker Desktop on macOS, Windows or Linux |
| Infoblox | A Portal login that can create a User API key |
| Network | Outbound HTTPS to csp.infoblox.com |
| Port | 8080 free on your computer, or change PORT (see Troubleshooting) |
Updating
Nothing updates on its own. Bloxsmith shows a small banner when a newer version is out, and you
decide when to take it. Open the Bloxsmith folder from step 2:
| Your computer | What to do |
|---|
| macOS | Double-click update.command |
| Windows | Double-click update.bat |
| Linux | Run ./update.sh |
Your passphrase, keys and saved views are kept. The dashboard is unavailable for about a minute.
Update by typing it yourself, or for the other install methods
From the Bloxsmith folder, this does the same as the update files:
# download the newest Bloxsmith and restart it
docker compose pull && docker compose up -d
If you installed with Homebrew or an installer script, click the Update button in the dashboard's header, or
run:
# download, check and swap in the newest version; restart Bloxsmith afterwards
bloxsmith update
All update modes, including pinning a version: docs/DEPLOYMENT.md.
Other ways to install (Homebrew, installer script, Docker without Compose)
These skip Docker Compose, so the update files above do not apply to them.
Docker without Compose, any computer
# run Bloxsmith with two named storage volumes: one for your keys, one for the audit log's signing key
# PUBLISHED_BIND tells it the port is only on this computer; without it (or a DASHBOARD_TOKEN) it refuses changes
docker run -d --name bloxsmith -p 127.0.0.1:8080:8080 -e PUBLISHED_BIND=127.0.0.1 -v noc-vault:/vault -v noc-audit-trust:/audit-trust --restart unless-stopped ghcr.io/holland-built/bloxsmith:latest
The two volumes are separate on purpose, so a copy of one is not a copy of both. Leave out the
second one and the audit log still records everything, but after you replace the container it
reports could not verify instead of intact.
macOS with Homebrew
# install Bloxsmith
brew install holland-built/tap/bloxsmith
# start it; it runs until you press Ctrl+C
bloxsmith
macOS or Linux installer script
# download the installer
curl --proto '=https' --tlsv1.2 -fsSLo install.sh https://github.com/holland-built/bloxsmith/releases/latest/download/install.sh
# read it before running it; press q to quit
less install.sh
# run it
sh install.sh
Windows installer script (Command Prompt or PowerShell)
REM download the installer
powershell -Command "iwr -UseBasicParsing -OutFile install.ps1 https://github.com/holland-built/bloxsmith/releases/latest/download/install.ps1"
REM read it before running it
notepad install.ps1
REM run it
powershell -ExecutionPolicy Bypass -File .\install.ps1
The macOS and Linux script asks one question at the end: whether to start Bloxsmith when you log
in. Then open .
| System | Where the program goes |
|---|
| macOS, Linux | ~/.local/bin/bloxsmith. No sudo. --prefix DIR picks another folder, --version vX.Y.Z pins a version |
| Windows | %LOCALAPPDATA%\Programs\Bloxsmith\bloxsmith.exe, added to your PATH. Open a new terminal before running it |
Both installers check the download's SHA-256 checksum and refuse to install if it does not match.
They also check an Ed25519 signature and refuse if the signature is missing or wrong.
See Code signing below.
Commands for the Homebrew and installer-script versions
| Command | What it does |
|---|
bloxsmith | Start it at |
bloxsmith --port 9090 | Start it on another port (or set PORT=9090) |
bloxsmith service install | Start it in the background every time you log in |
bloxsmith update | Download and swap in the newest version |
bloxsmith vault-backup ./backup.tar.gz | Save your encrypted keys, views, branding and audit log to one file |
Optional: the AI query box
The query box needs an AI model that can call tools. Everything else works without it. The
default is Groq, which has a free tier: get a key at , then add it in
the dashboard (sidebar > AI provider) or set GROQ_API_KEY. Any OpenAI-compatible provider
works: docs/DEPLOYMENT.md.
Sharing it on your network
> [!WARNING]
> LAN mode has no login. Anyone on your network can open the dashboard and query your Infoblox
> tenant with your key. Lock the vault when you are not using it, or use the secure proxy below.
Run it as an always-on server
# expose Bloxsmith to your whole network; the token is what lets people make changes
DASHBOARD_TOKEN=pick-a-long-random-string BIND=0.0.0.0 docker compose up -d
Without DASHBOARD_TOKEN, a network-facing Bloxsmith refuses every change (provisioning, deletes,
tenant keys) and only shows data. Paste the token into Settings so your browser sends it.
The safer choice is the secure proxy: HTTPS with a username and password on port 8443, while
Bloxsmith itself only listens on the machine. It needs the whole repo, because the proxy reads
deploy/Caddyfile. The quick-start folder does not have it.
# get the repo, which includes the proxy settings
git clone https://github.com/holland-built/bloxsmith && cd bloxsmith
# make your own copy of the settings file
cp .env.example .env
# turn a password into the hash the proxy stores (use your own password)
docker run --rm caddy caddy hash-password -p 'your-password'
# open the settings: set BIND=127.0.0.1 and paste the hash into BASIC_AUTH_HASH
nano .env
# start Bloxsmith and the proxy; open https://:8443
docker compose --profile secure up -d
Leave BASIC_AUTH_HASH empty and the proxy has no working password. Leave BIND at 0.0.0.0
and anyone can still skip the proxy by using port 8080.
Your keys are encrypted in the noc-vault volume. If you turn on auto-unlock, the passphrase is
stored on the same machine, so the encryption protects a stolen disk or backup, not a machine
someone is already logged in to. What the encryption is worth.
Full server, proxy and auto-unlock steps: docs/DEPLOYMENT.md.
Backup and uninstall
> [!WARNING]
> Restoring a backup replaces the keys, views and audit log you have now. Uninstalling with
> -v, --purge or -Purge, or removing the noc-vault volume, deletes your saved keys for
> good. Take a backup first if you might want them.
Back up and restore
The backup file holds your vault already encrypted, so it is as secret as your passphrase. The
audit signing key and .env are not in it on purpose: why, and the restore
checks.
With Docker, with or without Compose:
# write a backup to the container's temporary folder, outside the vault volume
docker exec bloxsmith /app/bloxsmith vault-backup /tmp/backup.tar.gz --force
# copy it out to the current folder, owned by you
docker cp bloxsmith:/tmp/backup.tar.gz .
The copy in the container's temporary folder is gone when the container is replaced, and the next
backup overwrites it.
With Homebrew or an installer script:
# save everything into one file only you can read
bloxsmith vault-backup ./backup.tar.gz
To restore, stop Bloxsmith first. A running copy keeps the old vault in memory and can write it
back over the restore. --force replaces the files the backup holds and leaves other files alone.
With Docker, with or without Compose, from the folder that holds backup.tar.gz. In Command
Prompt, write %cd% where it says $PWD:
# stop Bloxsmith; its volumes are kept
docker stop bloxsmith
# restore the backup into the noc-vault volume with a one-off container
docker run --rm -v noc-vault:/vault -v "$PWD":/backup:ro ghcr.io/holland-built/bloxsmith:latest vault-restore /backup/backup.tar.gz --confirm restore --force
# start Bloxsmith again and unlock it with the passphrase the backup was made with
docker start bloxsmith
With Homebrew or an installer script, stop Bloxsmith (Ctrl+C, or bloxsmith service stop if it
runs at login), then:
# put the backup back
bloxsmith vault-restore ./backup.tar.gz --confirm restore --force
Uninstall
Each method keeps your keys unless you add the delete option.
Docker Compose, from your Bloxsmith folder:
# stop and remove Bloxsmith, keep your keys
docker compose down
# stop and remove Bloxsmith and delete its volumes, including your keys
docker compose down -v
Docker without Compose:
# remove the container and delete the volume that holds your keys
docker rm -f bloxsmith && docker volume rm noc-vault
macOS or Linux installer script:
# remove the program, templates and login service, keep your keys
sh install.sh --uninstall
# remove everything, including settings and keys
sh install.sh --uninstall --purge
Windows installer script:
# remove the program and login service, keep your keys
powershell -ExecutionPolicy Bypass -File .\install.ps1 -Uninstall
# remove everything, including settings and keys
powershell -ExecutionPolicy Bypass -File .\install.ps1 -Uninstall -Purge
Homebrew:
# remove the login service first, because Homebrew does not know about it
bloxsmith service uninstall
# remove the program
brew uninstall bloxsmith
# optional: delete settings and keys on macOS
rm -rf ~/Library/Application\ Support/bloxsmith
Troubleshooting
| Symptom | Cause | Fix |
|---|
| Port 8080 is already in use | Another program has it | Change PORT in docker-compose.yml, or run bloxsmith --port 9090 |
| macOS says the app cannot be opened | The program is not signed by Apple | Right-click > Open, or run xattr -dr com.apple.quarantine on the file |
| Windows SmartScreen blocks it | The program is not signed by Microsoft | Click More info > Run anyway |
| Audit log says could not verify | The audit signing key volume was lost | Keep noc-audit-trust when you replace the container |
The signing warnings only apply to Homebrew and the installer scripts. The Docker install never
puts a program on your computer.
Code signing
Releases are built and published by GitHub Actions. The Windows and macOS programs are not
signed by Apple or Microsoft, which is why the warnings in Troubleshooting appear.
Each release's checksums.txt has two signatures:
| Signature | Checked by | What it proves |
|---|
| Ed25519 | The installer and the in-app updater, automatically | This project published the release. Both refuse a release with a missing or bad signature |
| Cosign (keyless) | You, by hand | Which GitHub workflow run built the files |
The Ed25519 public key is built into every program (go/signing.go) and pinned in both installer scripts,
so the key that decides whether a release is genuine does not come with the release. It stops
someone who can change release files. It does not stop someone who controls this repo's CI.
# check that checksums.txt was signed by this repo's release workflow
cosign verify-blob --certificate checksums.txt.pem --signature checksums.txt.sig --certificate-identity-regexp '^https://github\.com/holland-built/bloxsmith/\.github/workflows/release\.yml@refs/tags/' --certificate-oidc-issuer https://token.actions.githubusercontent.com checksums.txt
Report signing problems in the GitHub issue tracker.
For developers
How it works
browser --HTTP--> bloxsmith (Go program) --MCP--> csp.infoblox.com/mcp
                        \-- optional: AI model (Groq or OpenAI-compatible)
A browser cannot call the Infoblox MCP endpoint directly, so the Go program sits in between and
holds your API key.
Build, run and test
You need Go 1.26 or newer and Node.js 24.
# get the code
git clone https://github.com/holland-built/bloxsmith && cd bloxsmith
# build the web UI, clear out the old copy, and copy the new one into the Go program's folder
cd ui && npm ci && npm run build && rm -rf ../go/web/* && cp -R dist/* ../go/web/ && cd ..
# build and start the program at http://localhost:8080
cd go && go build -o bloxsmith . && ./bloxsmith
# live development server on port 8090; rebuilds when you save a file
scripts/dev-serve.sh
# run the Go tests
cd go && go test ./...
# run the browser tests against a throwaway server, skipping tests that touch a live one
E2E_SKIP_LIVE=1 npm run test:e2e
| Path | Holds |
|---|
go/ | The server, with the built UI embedded from go/web/ |
ui/ | The web UI source |
tests/ | Playwright browser tests |
scripts/ | Dev server, test runner and release helpers |
docs/ | Deployment guide, tab guide, design decisions |
deploy/ | Settings for the optional secure proxy |
third_party/ | The Inter font, and the open-source projects the provisioning engine is based on |
The files at the top level stay there because something reads them by that path. The quick
start downloads docker-compose.yml and the update files from there. The release build
packs LICENSE and NOTICE.md. The release tool reads its steps from SHIP.md, and
package.json and playwright.config.ts set up the browser tests. .env.example is the
settings template for Docker Compose. CLAUDE.md holds the notes Claude Code loads for this repo.
Full reference, including every setting: docs/DEPLOYMENT.md.
Credits and license